Table of Contents
Abstract
What to do if a light does not light. What to do when your hair dryer will not turn on. How to map the circuits in your breaker panel. How to hook up a generator, if you don’t want to hire an electrician. How does a 208 volt circuit differ from a 120 volt circuit. Bring your electric questions to find answers.
Home Wiring Introduction
Tools needed
For most home electric work you need a few hand tools, and a meter. Here is my list of tools.
Screw drivers, both regular and Phillips head. You will need these to remove covers, install boxes, and other tasks.
Wire strippers are necessary to remove insulation from wires. There are several different types available
- Needle nose pliers. This is used to bend wires around terminals.
- Lineman’s Plyers. These are used to cut wires and twist them together.
Flash Light. You will need this to look into dark corners.
Multi Meter. This is a device used to measure voltage, and resistance primarily when working with house wiring. The one shown was available from Amazon for under $10 as of the end of November 2020.
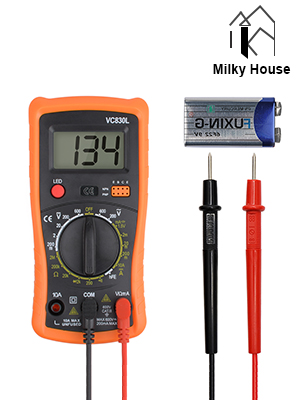
There are other specific tools for special needs, but we will not discuss them until they are needed.
Electrical Safety
When we deal with electricity, we need to keep a few safety ideas in mind. Here is my list of safety protocols to keep in mind.
- Always turn off the power before working on wires. Sometimes we need the cover off and the power on to check a circuit. But always make it a habit to test an electric wire to make sure it is off before touching it.
If you are working on a 240 volt circuit, such as a cloths dryer, there are two hot wires, not one. 240 volts can be a fatal shock, so be extra careful.
When you connect two wires in an electric box, use a wire nut, not electrical tape. We will discuss wire nuts later.
For more specific information see Safe electric wiring/ household 120-240 Volt.
How Your House is Wired
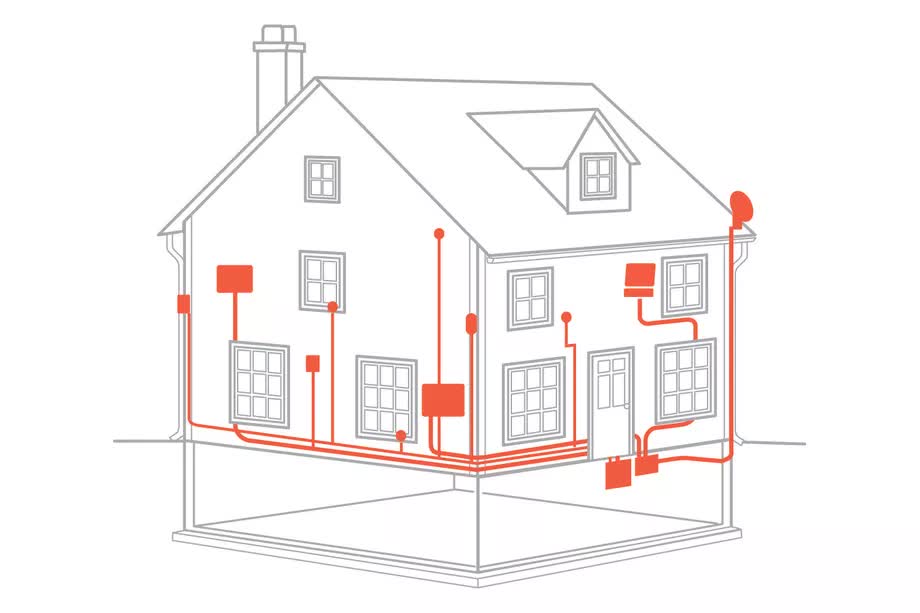
I think it is time to go over a lot of information about how a house, condo, or apartment is wired. I was doing some research on the internet and came across this amazing source of information.
So rather than recreate a lot of drawings and pictures, I am going to use an external web site, Water Heater Timer / water heaters, timers, electrical, plumbing. Don’t be put off by the name of the site, there is a lot of good information about electricity.
Basic house wiring
Lets start by looking at the breaker panel. This is the point where electricity enters the house. The panel contains a master breaker, typically at the top. Each of the two hot legs is attached to a bus inside the box. The breakers clip into a mounting strip that holds the back of the breaker. The other part of the breaker clips onto the bus carrying the power from the main breaker. See: Circuit breakers.
Next we see a basic 120 volt circuit as it might be wired in you home. Notice that the wires jump from one box to the next, this is typical of how the power is run. What this means is that lights and outlets are often on a single breaker.
The next part of the page discusses wire size and type. If you are repairing existing wiring you do not need to be concerned with wire size. If you are installing new wires, you need to use the correct size wire. Most house wire is 10, 12, or 14 gauge. Additionally most of the wiring will be with solid wire not stranded.
Next comes a section on switches and outlets. Light switches typically only switch the hot line, the neutral is wired directly to the light. Lets look at switch wiring in more detail at: How to wire switches
Notice how the outlets are wired, the short slot is the hot, and the longer slot is the neutral. The ground is typically colored green.
We can see how wiring is routed through a typical wood frame house. In some zoning areas the wire is armored to prevent fires, and the studs are metal. But the metal studs have cutouts in them to route the wires through.
Troubleshooting Your Home
Map your Distribution Panel
One suggestion I would make to everyone is to create a circuit map for your home. This involves switching off each circuit breaker one by one and making notes of which outlets and lights are controlled by that circuit breaker. If you are lucky someone has already done this for you. If not you should create your own map.
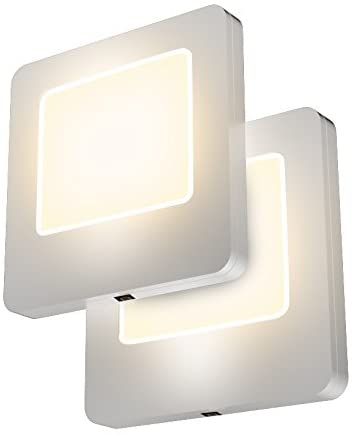
I find a simple night light like this works very well to indicate which outlets are live. They are easy to carry around and plug into outlets to check them.
The light did not come on
Lets start with the simplest of home troubleshooting, a light does not light when you turn on the switch.
The first step is always to stop and think about what could go wrong, and prioritize it from most likely to least likely. So lets list the steps in the order they are most likely, and discuss how to verify each step.
- The light bulb burned out.
The verify this, remove the bulb from it’s fixture.
Screw the bulb into a light you know works, and see if the bulb turns on. If it fails, replace the bulb.
- The circuit breaker tripped.
So you know the bulb is good, next most likely fault is the circuit breaker.
Go to the breaker panel and see if it tripped. If unsure, switch the breaker off and back on. If it is still shorted it will immediately trip again. If it stays on, retry the light. If the breaker trips again you have a short in the line. We will address this question later.
- The switch has failed.
- You can test the switch by using the meter. You can remove the cover that measure the voltage on the screws to see if the voltage is present. Then measure the output to the light fixture. Note: often you can use the screw terminal on the switch for the ground to measure voltage against. Replacing the switch is simply a matter of moving the wires from the old switch to a new switch.
An outlet is dead
- The GFCI circuit has tripped.
Try the reset button
I find the test button is easily tripped. My wife does it often with her hair dryer.
GFCI (Ground Fault Circuit Interrupt) is commonly used in a bathroom. Since these are designed to trip when they detect current flowing in a ground wire they include both a test and a reset button. For more information see How to wire GFCI.
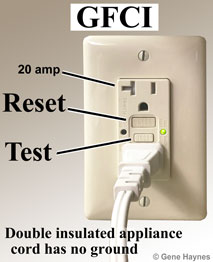
- The circuit breaker has tripped.
Go to the breaker panel and see if it tripped. If unsure, switch the breaker off and back on. If it is still shorted it will immediately trip again. You might have too many appliances plugged into a line.
Using your circuit map, see what is plugged into circuit. It is often easiest to just unplug any devices connected and try the circuit breaker again. If this works you need to look at what you are plugging into the circuit, you are probably overloading the circuit. If the breaker trips again you have a short in the line. We will address this question later.
An electric cord is hot
One common problem is too many devices on an extension cord. This can be caused by using a high current device, such as a hair dryer, cooking hot plate, or space heater on an extension cord. Extension cords are rated for how much current they are designed to carry.
- Check the current used by the appliance you have plugged into the cord. Check the wire size of the extension cord and compare the wattage with this table.
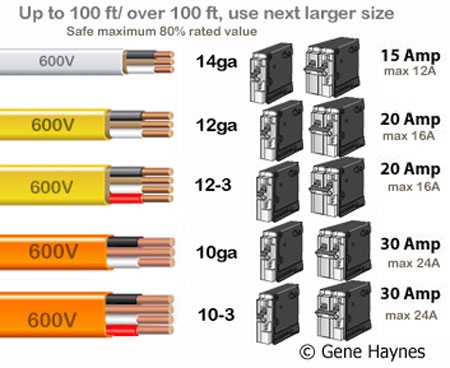
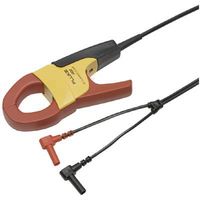
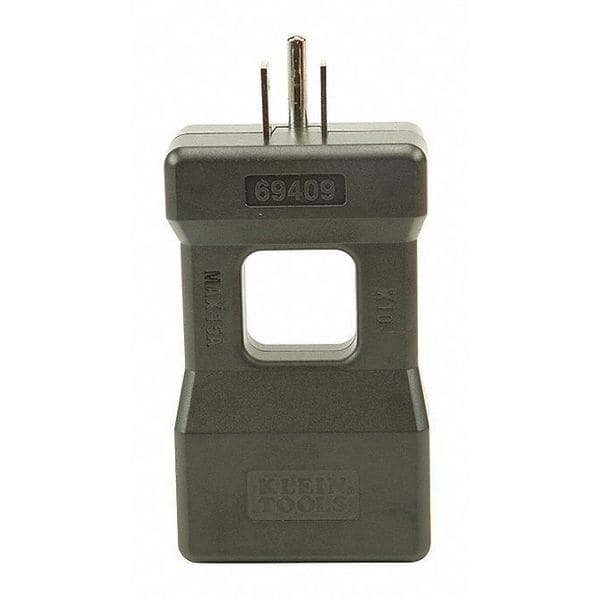
- If you want to measure the current used by an appliance you can use a current clamp. To use a current clamp with an appliance you will need to make a special adapter to split the hot and neutral wires. Or use an adapter as shown.
You think you have a short
Shorted wires inside walls are difficult to find, but also present a fire hazard to a home. Lets assume you have decided you have a shorted wire, and you are sure it is not external to the circuit. ie the short is in the house wiring not a cord.
- With the circuit breaker off, go the first outlet or light connected to that breaker. Remove the fixture and leave the hot wire disconnected and covered with a wire nut.
Try the circuit breaker again. If it works, check the other outlets and lights to see if they are live. If they are live you have found the short.
If the circuit is still shorted repeat by reconnecting the first outlet and go on to the next. This is tedious but works.
If you get to the last outlet and still have not found the problem it is from the breaker to the first circuit.
How To
Wire an extension Cord
Sometimes extension cords get cut or damaged. When that happens near one end it is often better to shorten the cord and replace the end. So lets look at how to wire a three prong plug onto a 3 conductor wire.
Replacing The Male Plug On An Extension Cord Or Power Cord
Wire a Wall outlet
In some older homes you will find outlets with only 2 slots. But many of today’s appliances and tools contain a 3 prong plug. So you need to replace the old outlet with a new one. This method is also useful if your kitchen or bathroom does not have GFCI outlets.
Sometimes when you replace an outlet there will be two wires, one brings in the power and one connects to another outlet. The outlet has two screws on each side so it is easy to connect the hot and neutral wires. But the ground screw is not designed for 2 wires. So you need to take a short piece of wire and twist the two ground wires with the short tail. The connection is then capped with a wire nut before the tail is connected to the ground screw. See Basic Wiring
Hookup a portable Generator
If your house has an electric washing machine, or another 240 volt plug near the garage you are in luck. One trick I learned from my neighbor years ago has saved me much money when hooking up a portable generator.
Lets suppose you have an electric washing machine with a connector that looks something like this.
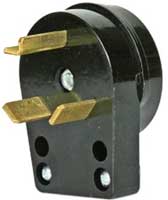
Now suppose you purchase a portable generator in the 5 to 7 Kilowatt range. You can purchase an extension cord for the generator. Next you purchase a plug like the one on your electric dryer. Remove the female connector from the extension cord and replace it with the Cloths dryer plug.
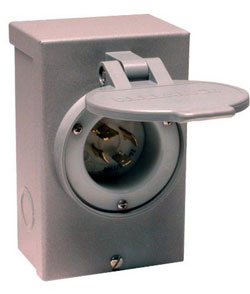
Or if you would rather be safe you can install a generator outlet box near your electric panel with it’s own 30 amp 240 circuit breaker.
Hooking up the generator
When you lose power you can follow these steps to supply power to your home.
Roll the generator outside. You don’t want to run it in the garage because you can get Carbon Monoxide in your house.
On the circuit panel turn off the main circuit breaker. This is the one normally at the top of the panel.
Plug the extension cord into the cloths dryer plug, or the generator outlet connector.
Start up the generator and plug the extension cord into the generator, you now have power.
Disconnecting the generator
Turn off the generator first.
Disconnect the generator extension cord from both the generator and the house.
Turn the main circuit breaker back on. When power returns you will be back. You can do this even if the power line is live when you return.
Most Important: Never hook up the generator with the main circuit breaker on. This will back feed the power lines which can cause a fire. Also if the power company turns on with your generator connected, your generator will fry.
Written by John F. Moore
Last Revised: Mon 30 Nov 2020 07:36:12 PM EST

This work is licensed under a Creative Commons Attribution-NonCommercial-ShareAlike 3.0 Unported License.
