Abstract
Instead of using a Raspberry Pi for some toy, why not create a multi-zone thermostat. This month we are going to discuss how to implement a thermostat using a raspberry pi, relays, and temperature sensors.
Next meeting we will create a web interface for the thermostat so it can be controlled by any computer, tablet, or phone in the house.
How the furnace works
First we should understand about a heading/cooling system. I will discuss a circulating hot water system as seen here.
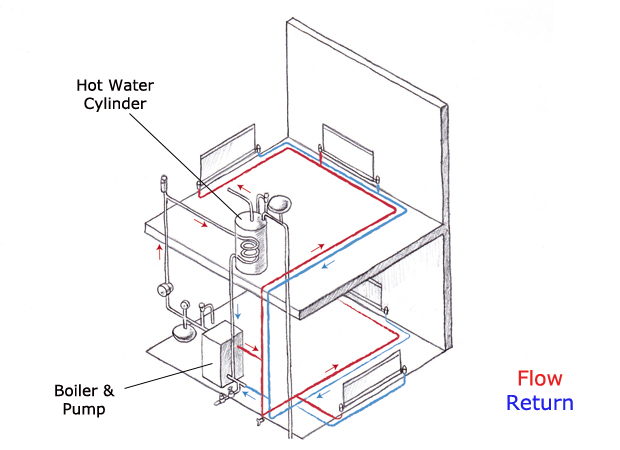
This is a circulating hot water heating system. Often this type of system is divided into multiple zones. Each zone has it’s own thermostat and heats some part of the house.
Furnace Types
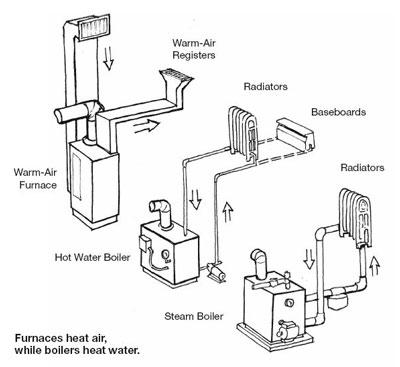
This shows the most common furnace types. Some forced draft heating systems also contain air conditioning. But basically all these system have one function, to heat (or cool) our homes.
Furnace control

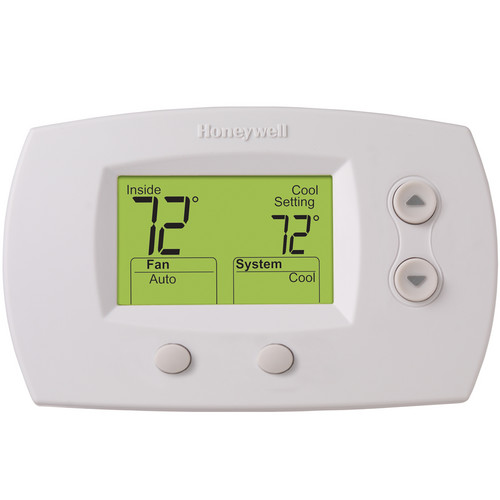
Furnace control is not our topic today, but all of these systems have one common feature. The thermostat does it’s job by opening and closing a switch. So for our purpose we going to control the system by using relay to simulate the opening and closing of the thermostat switches.
Introducing the Thermostat
Before we start discussing how to implement a thermostat with a micro controller, how about we discuss how a thermostat works. We will discuss a typical thermostat for both heating and cooling.
How a bimetallic thermostat switches on and off
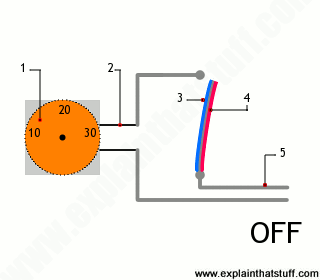
An outer dial enables you to set the temperature at which the thermostat switches on and off.
The dial is connected through a circuit to the temperature sensor (a bimetal strip, shown here colored red and blue), which switches an electrical circuit on and off by bending more or less.
The bimetal (“two metal”) strip is made of two separate metal strips fastened together: a piece of brass (blue) bolted to a piece of iron (red).
Iron expands less than brass as it gets hotter, so the bimetal strip curves inward as the temperature rises.
The bimetal strip forms part of an electrical circuit (gray path). When the strip is cool, it’s straight, so it acts as a bridge through which electricity can flow. The circuit is on and so is the heating. When the strip is hotter, it bends and breaks the circuit, so no electricity can flow. Now the circuit is off.
Copied from Thermostats
Bimetal with a mercury switch
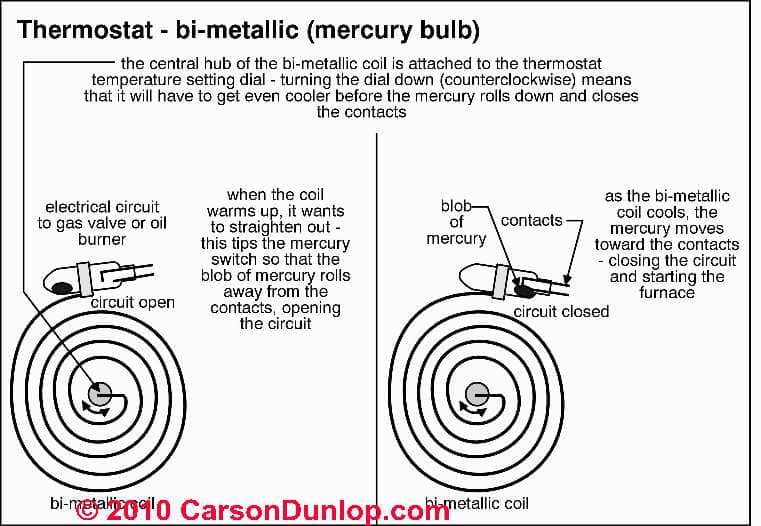
This thermostat uses a longer bimetal strip, but the switch uses a small blob of mercury to short the contacts. The basic operation is the same.
Basic components
For an electronic thermostat we need three basic elements:
One or more electronic temperature sensors.
One or more relays to switch on the heat, or the cold, or the fan.
A control mechanism to decide when to switch the relay.
Temperature Sensors
We could use a single temperature sensor in one location, as most thermostats do. But since they are small and inexpensive, lets put them in as many rooms as reasonable.
We want one in each of the rooms for each zone. Since you probably want them out of sight, you might mount them in a corner of the ceiling with a cover over them. You will need three conductor wire since you need +5, ground, and signal wires. But all the controllers can be on the same wire. Each sensor has a unique ID to distinguish them. These are available at Sparkfun
Perl programming for DS18B20 is at: Raspberry Pi - reading a DS18S20
Relays to switch the heat
We are going to use an 8 channel relay board so we have room to expand.
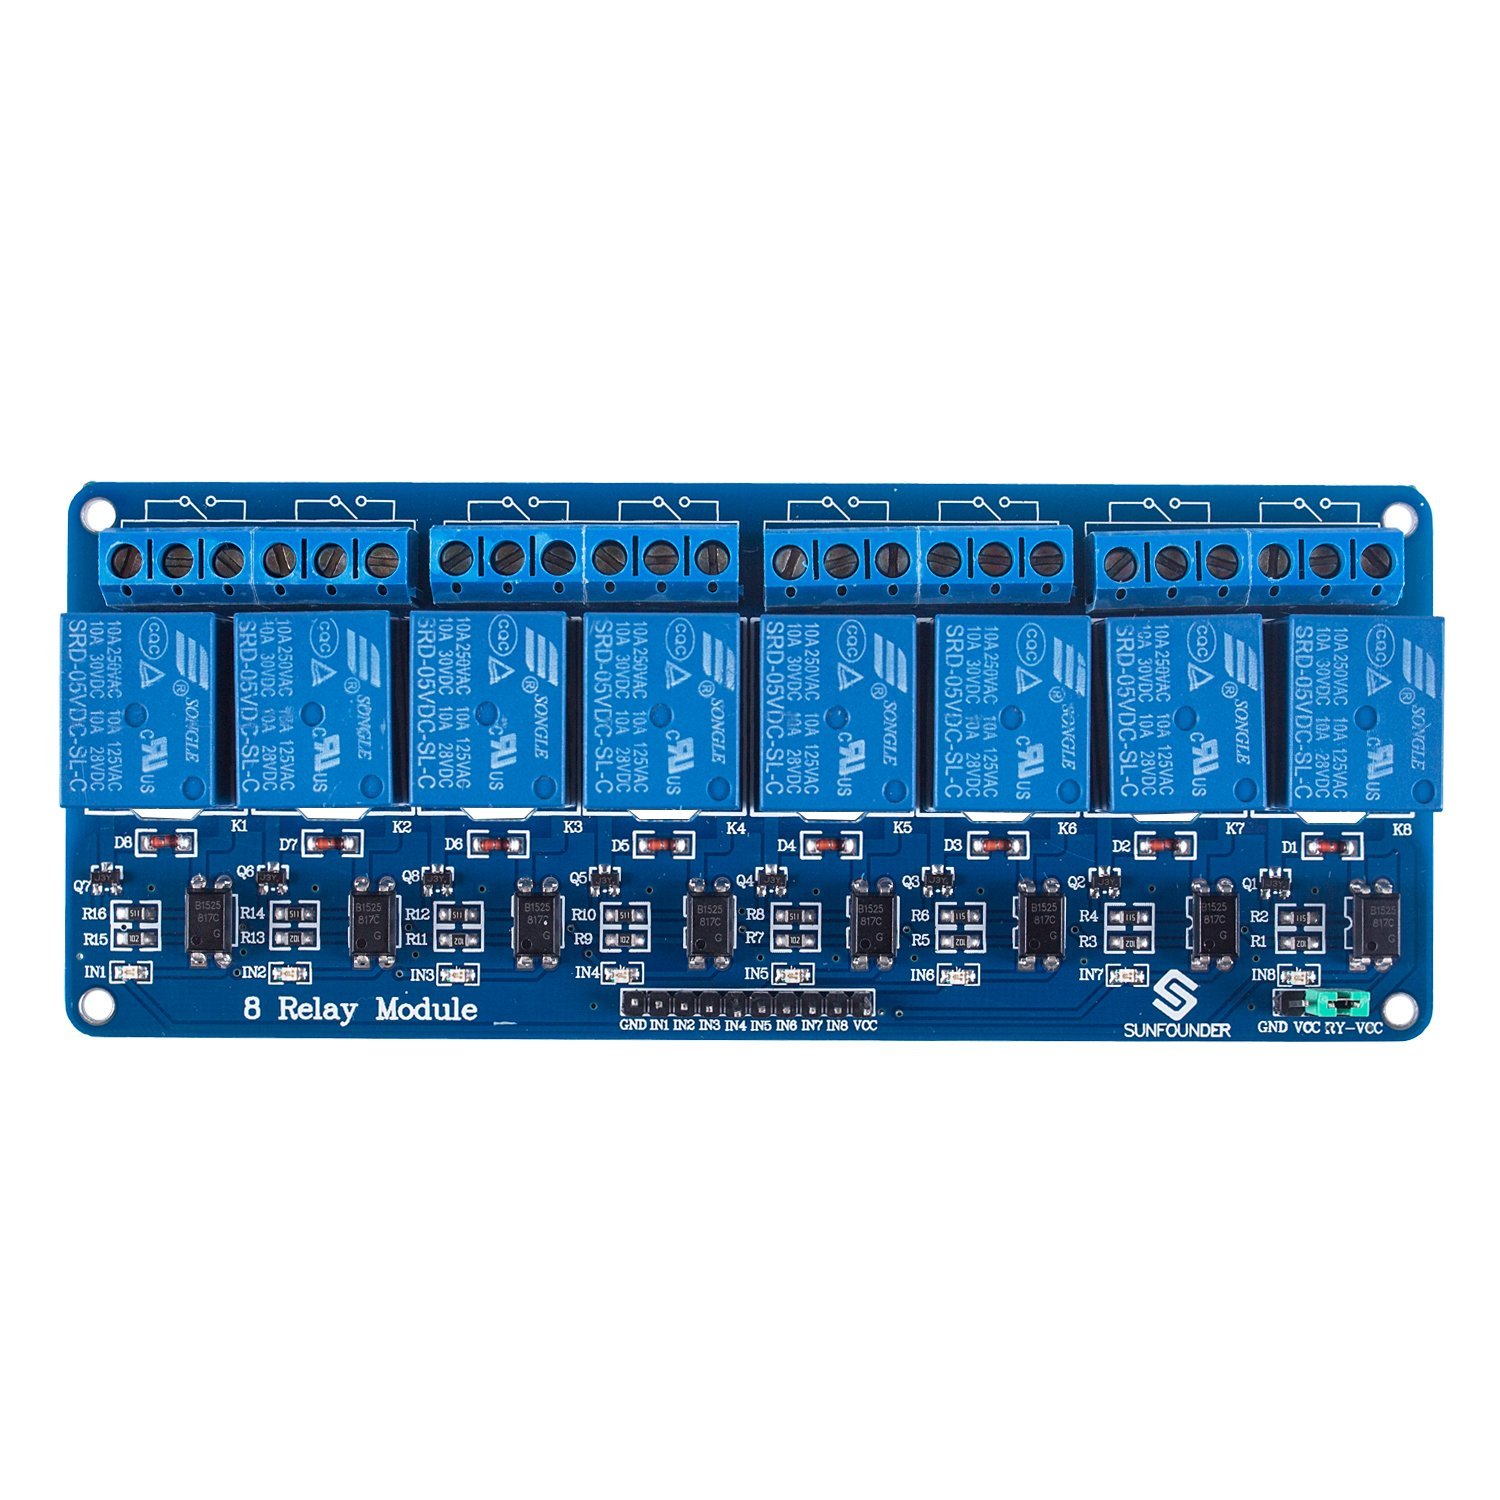
This board needs to be mounted so you can keep access to the contacts. Additionally you will need to use jumper wires from the Raspberry Pi to an interface board. We will discuss the interface board later. These boards are available from Amazon
Information about the board is available at: 8 Channel 5V Relay Module
Raspberry Pi
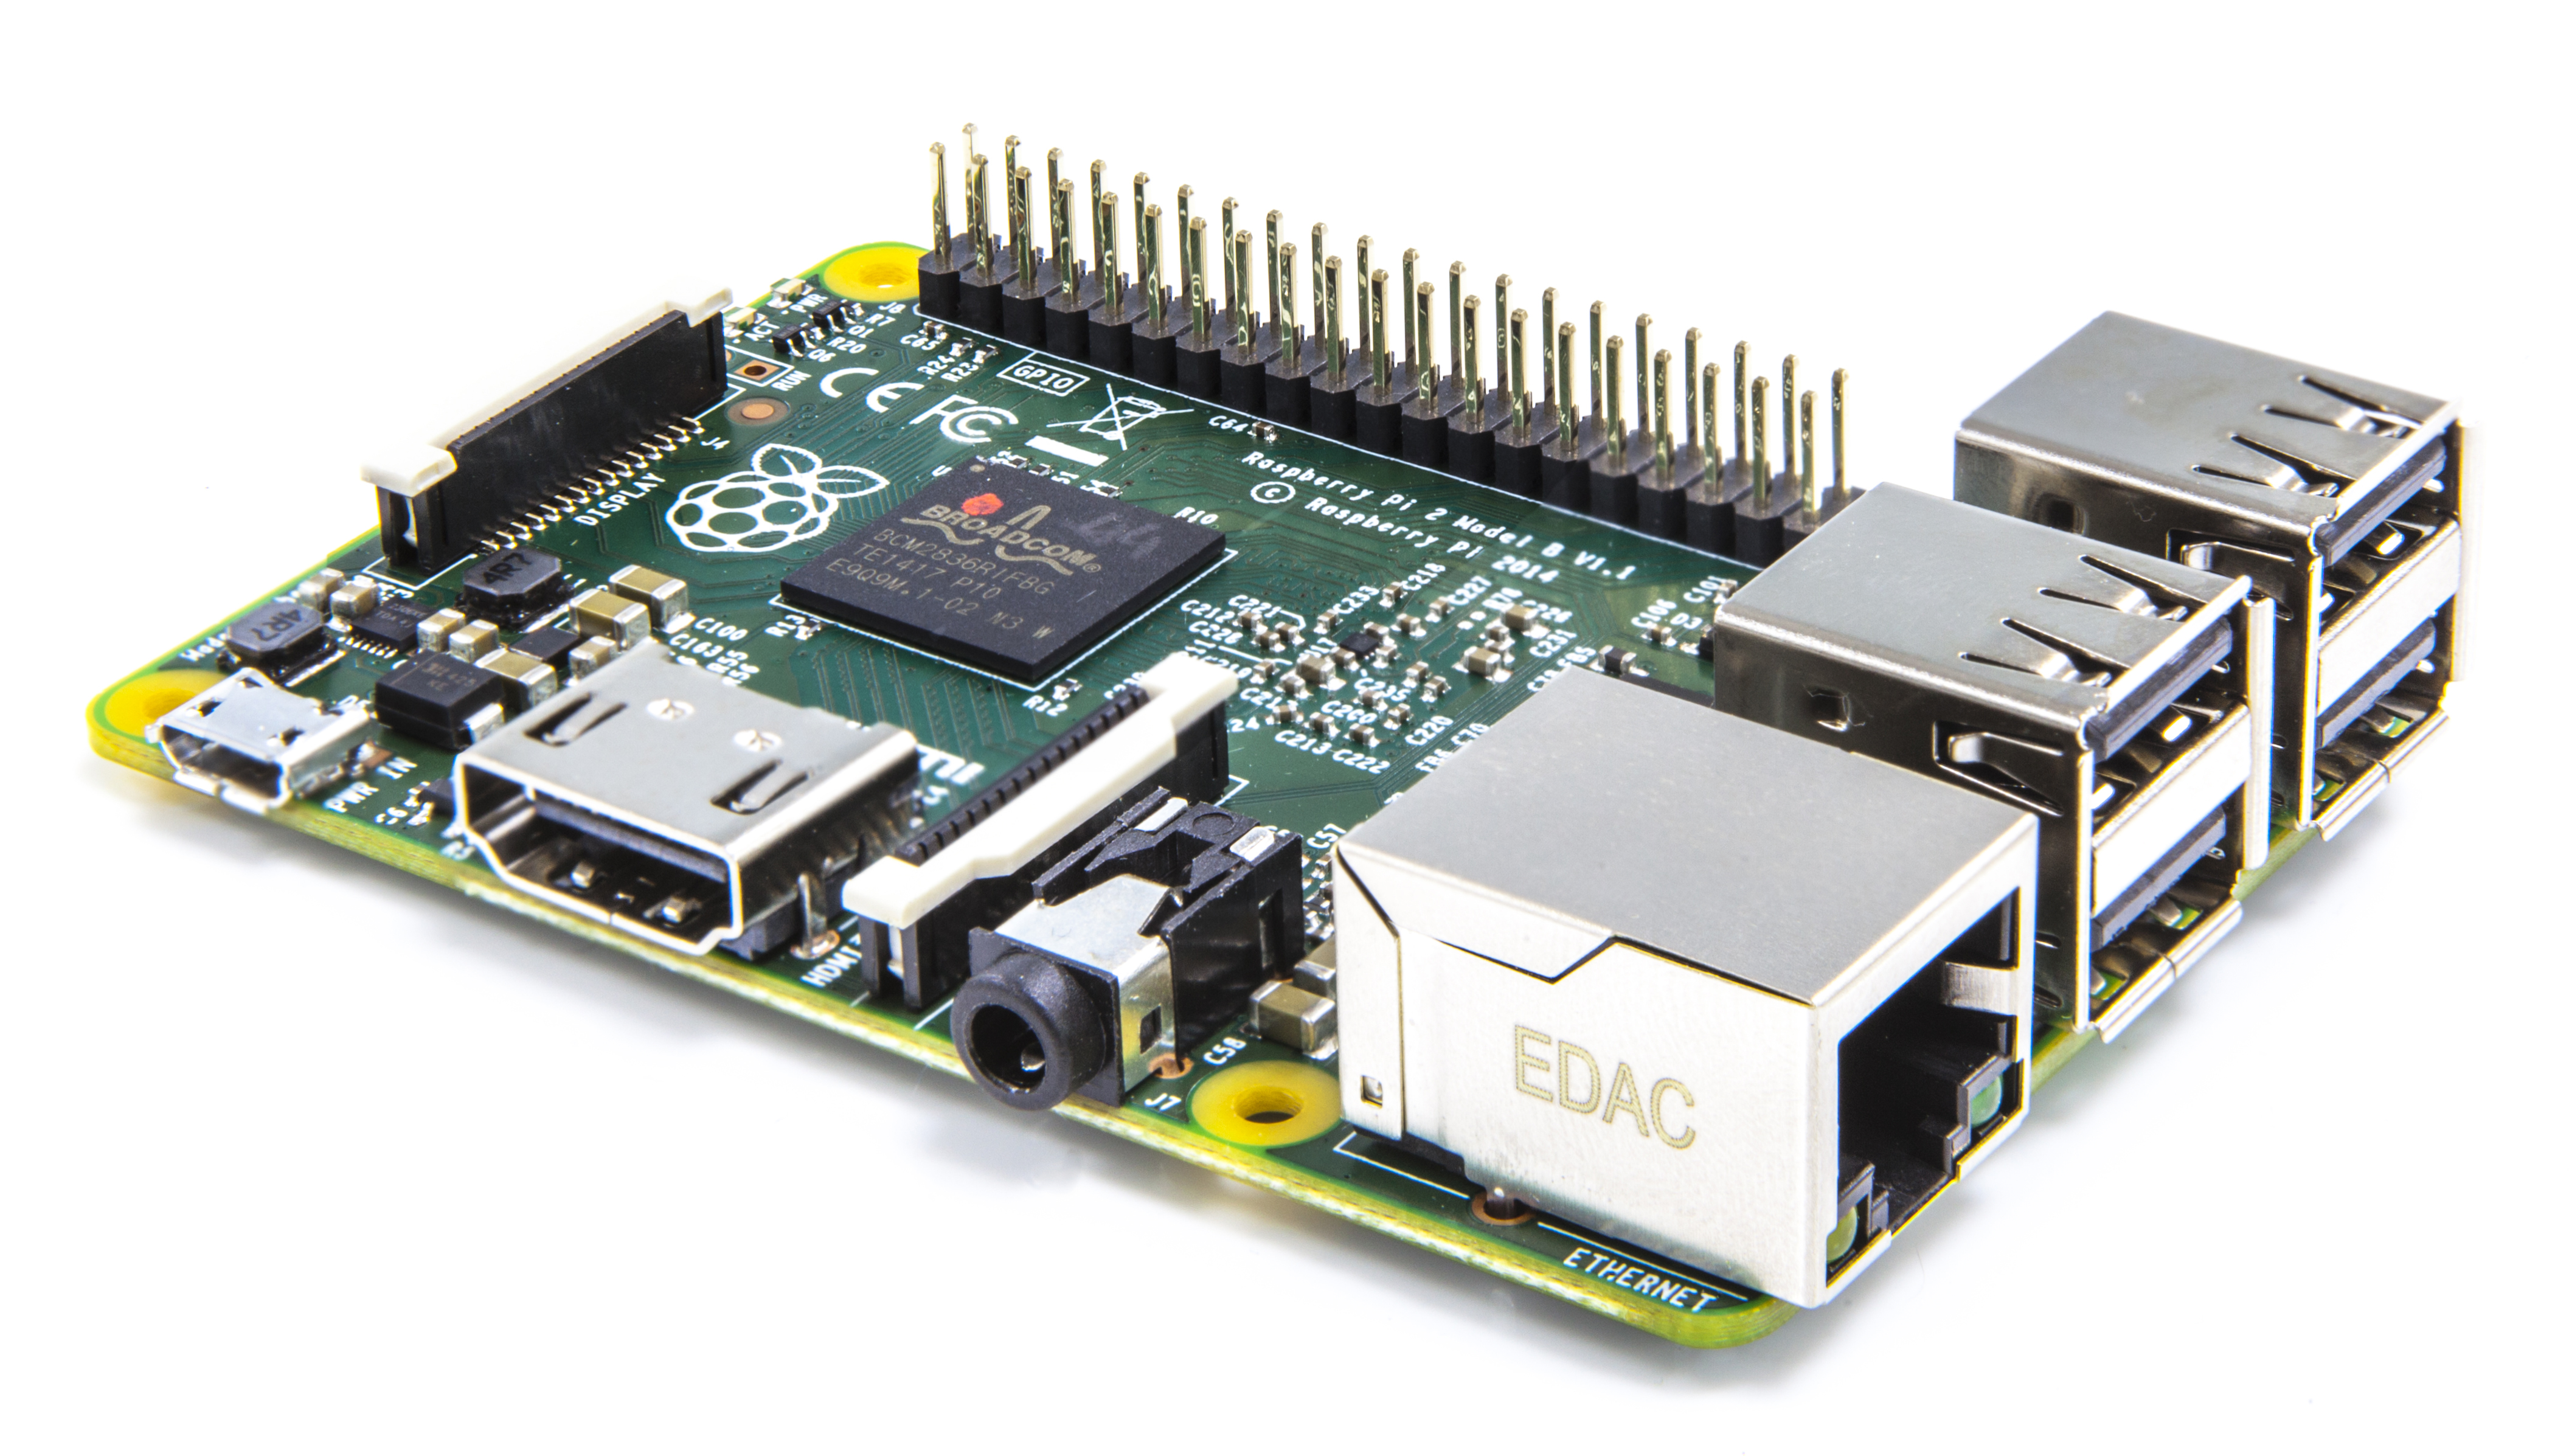
This is the heart of the system. I choose the raspberry pi since it is a full computer with multiple GPIO (General Purpose Input Output) pins.
Since it is a full computer, I can setup a web browser to access it for control. I can also enable a SSH server so I am able to login to the board for maintenance or other operations.
For information on how to setup your Raspberry Pi you should refer to my previous talk Raspberry Pi: Introduction.
Software Design
Now that we have an idea of what the hardware looks like, lets start discussing how we will design the software.
Assumptions
First we are going to decide how the system is going to be configured. This part will be different for each implementation of the system.
For this example, I am going to assume I have temperature sensors in 4 rooms. I will assume the furnace has two zones and that there are two temperature sensors in each room. First lets name the rooms, Bedroom, den, kitchen, and living room. I will assume the kitchen and living room are one zone and the bedroom and den are the other heating zone.
Overview of Program
I am going to use Perl to program this application. I like Perl for several reasons.
It is interactive so I do not need to compile it.
It has a built-in program validation. This allows me to catch some program errors with out running by using the command
perl -cTw test.pl.You can embed the documentation for the code in the same file as the code. This method perldoc allows easy access to the documentation from the file
perldoc test.pl.
Finally, I am not giving the finished program in this talk. This is on purpose. I want you to take the code snippets I provide and tie them together into a complete program. This will give you practice coding and help you understand the code better.
Data Storage
The way I would design the software is to put the data into a separate file. This will allow us to make changes to the data without modifying the program. An example is in data.txt.
Anything following a # is a comment.
The first line gives the status of each zone. 1 = Active heat, 2 = Off heat, 3 = Hold heat, 4 = Active cool, 5 = Off cool, 6 = Hold cool.
The next lines give the program using the following format
Col 1: Heating or cooling zone
Col 2: Day of the week where 0 = Sunday, 1 = Monday, 2 = Tuesday, 3 = Wednesday, 4 = Thursday, 5 = Friday, 6 = Saturday, 7 = Any weekday, 8 = Weekend, and 9 = Any Day
Col 3: Time of day. I am using 24 hour time to avoid AM and PM.
Col 4: Temperature in Fahrenheit
Col 5: Which relay to use H = Heat, C = Cool, F = Fan
Parsing the data file
So the first thing the program needs to do is to read in the data into an array to process it. For this I have an example read-data.pl.
The data is stored in an array called list. This is a two dimensional array which can be parsed using two subscripts like $list[1][3] with gives the temperature from line 2, the first setting.
Parsing the Time
One issue is to determine if the time is before or after the current time. This is how you would know when to use the setting. So I created a script date3.pl which is capable of determining if the time is past or future.
Once you have determined which temperature setting for each zone, you are ready to compare the setting to the actual temperature.
Capture the temperatures
Now that you have determined what is requested in the settings, you need to capture the temperature readings for comparison. I have created the script 1-wire-test.pl to capture the temperature values from the sensors.
The script will return the ID number and the temperature. You need to have a look up table of which sensor is in which room. I would suggest you put the values into an array for easy handling.
Decision Time
So lets think about what you need to do to determine if you should switch on the heat or cooling for a zone.
- Is the zone control active, or offline, or on hold. You can determine this from the first line of the data list.
If the zone is Off you ignore any settings.
If the zone is on Hold you do not change the temperature.
If the zone is Active you set it normally.
Compare the sensor temperatures to the set temperature. If it is heating is the actual temperature more than one degree below the setting. If so turn on the heat. If the cooling is on, is the temperature more than one degree above the setting. If so turn on the cooling. Question: we need to prevent heat and cool both being active for any zone.
If there is a Fan command the temperature is either 0 or 1. If 0 the fan is turned off, of 1 the fan is turned on.
Fire the Relays
Once you have decided which zones and relays need to be active you need to change the relays. I have an example of turning on and off the GPIO pins to control the relays in blink-led.pl. For my demo bread board I substituted an LED for a relay, but the relay board controls each relay by turning on or off a GPIO pin.
Are You done?
If you have a program that does all the above steps you should now be able to run the system. This program could run continuously using a sleep to determine how long between each iteration. Or is could be run then exit. A cron job could be used to restart is every minute if desired.
Questions?????
In the next meeting we will discuss how to install a web server on the Raspberry PI to allow us to set the values using a web browser. By then you should have a working thermostat. Best luck, and don’t forget if you get stuck, try Googling for an answer.
Written by John F. Moore
Last Revised: Tue 01 Sep 2020 08:13:15 PM EDT

This work is licensed under a Creative Commons Attribution-NonCommercial-ShareAlike 3.0 Unported License.